
Add live chat to your website
Step-by-step guide to add the Zickt live chat widget to your website. Covers HTML, React, Next.js, and Google Tag Manager installation with domain security.
Add live chat to your website so visitors can start conversations with your team directly from any page.
Prerequisites
- A Zickt workspace (create one here if you haven't already)
- A Messenger channel created in Settings > Channels — you can customize the widget appearance later
- Access to your website's HTML or build system
Steps
Find your channel key
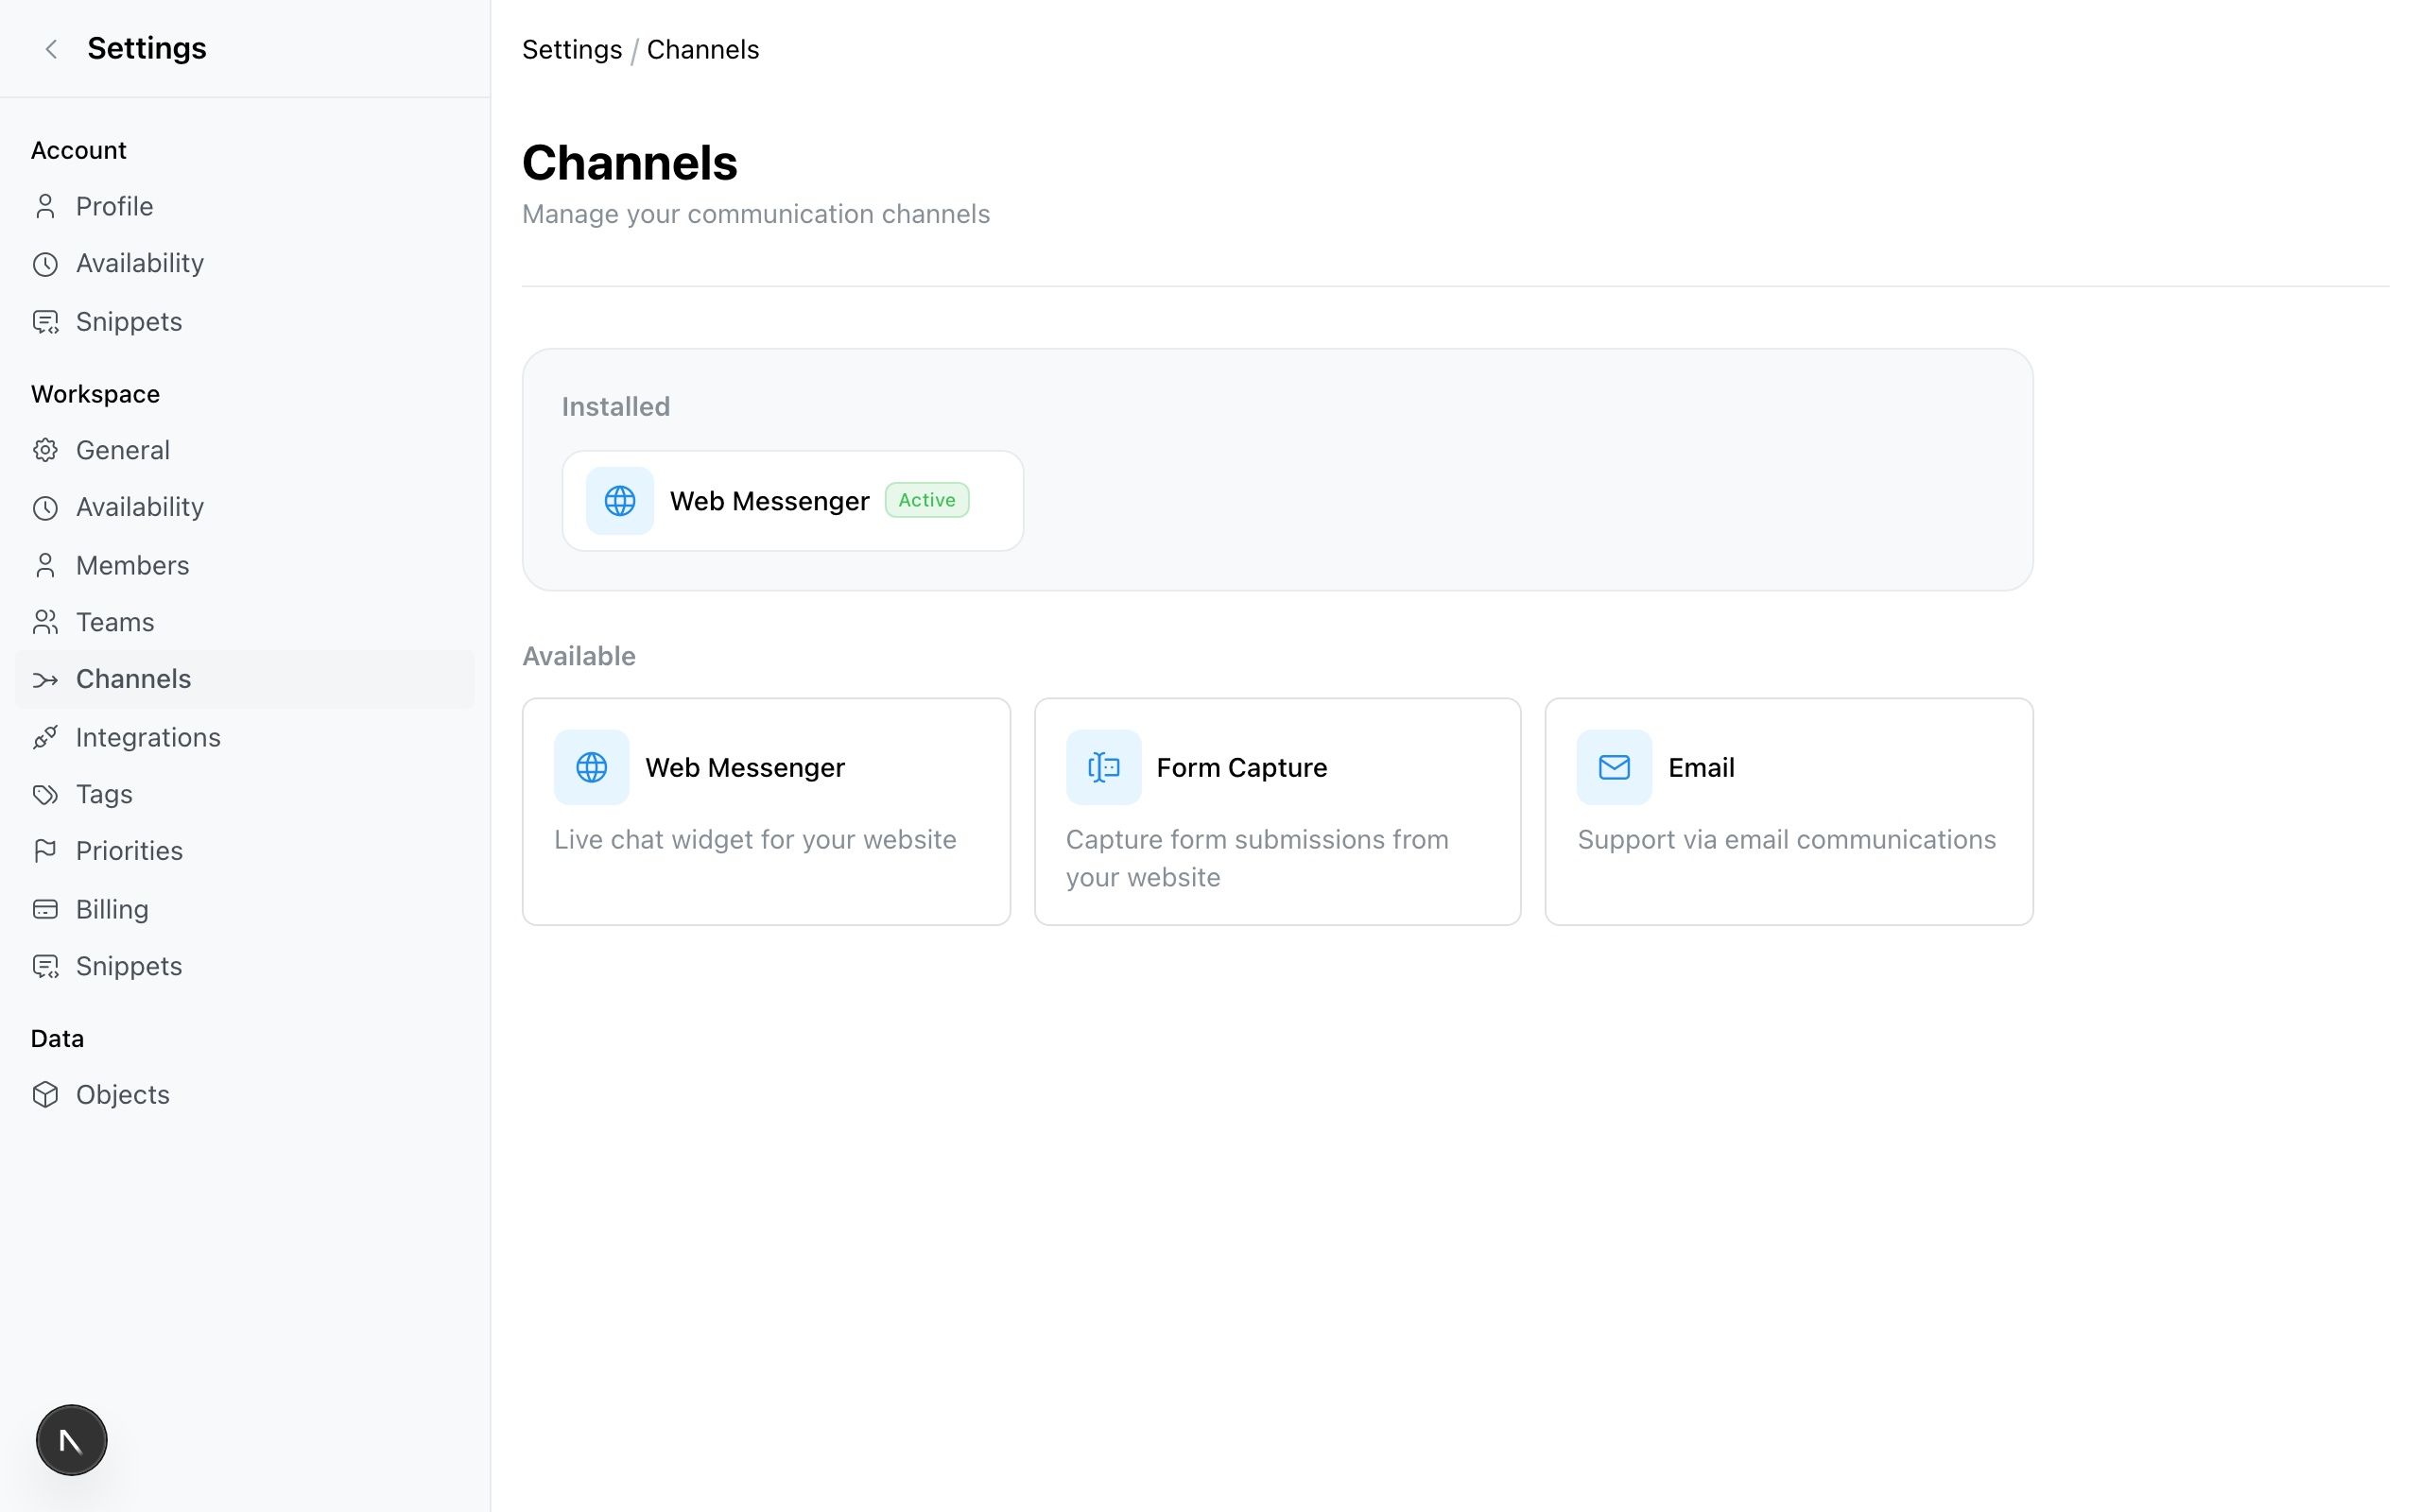
Open Settings > Channels.
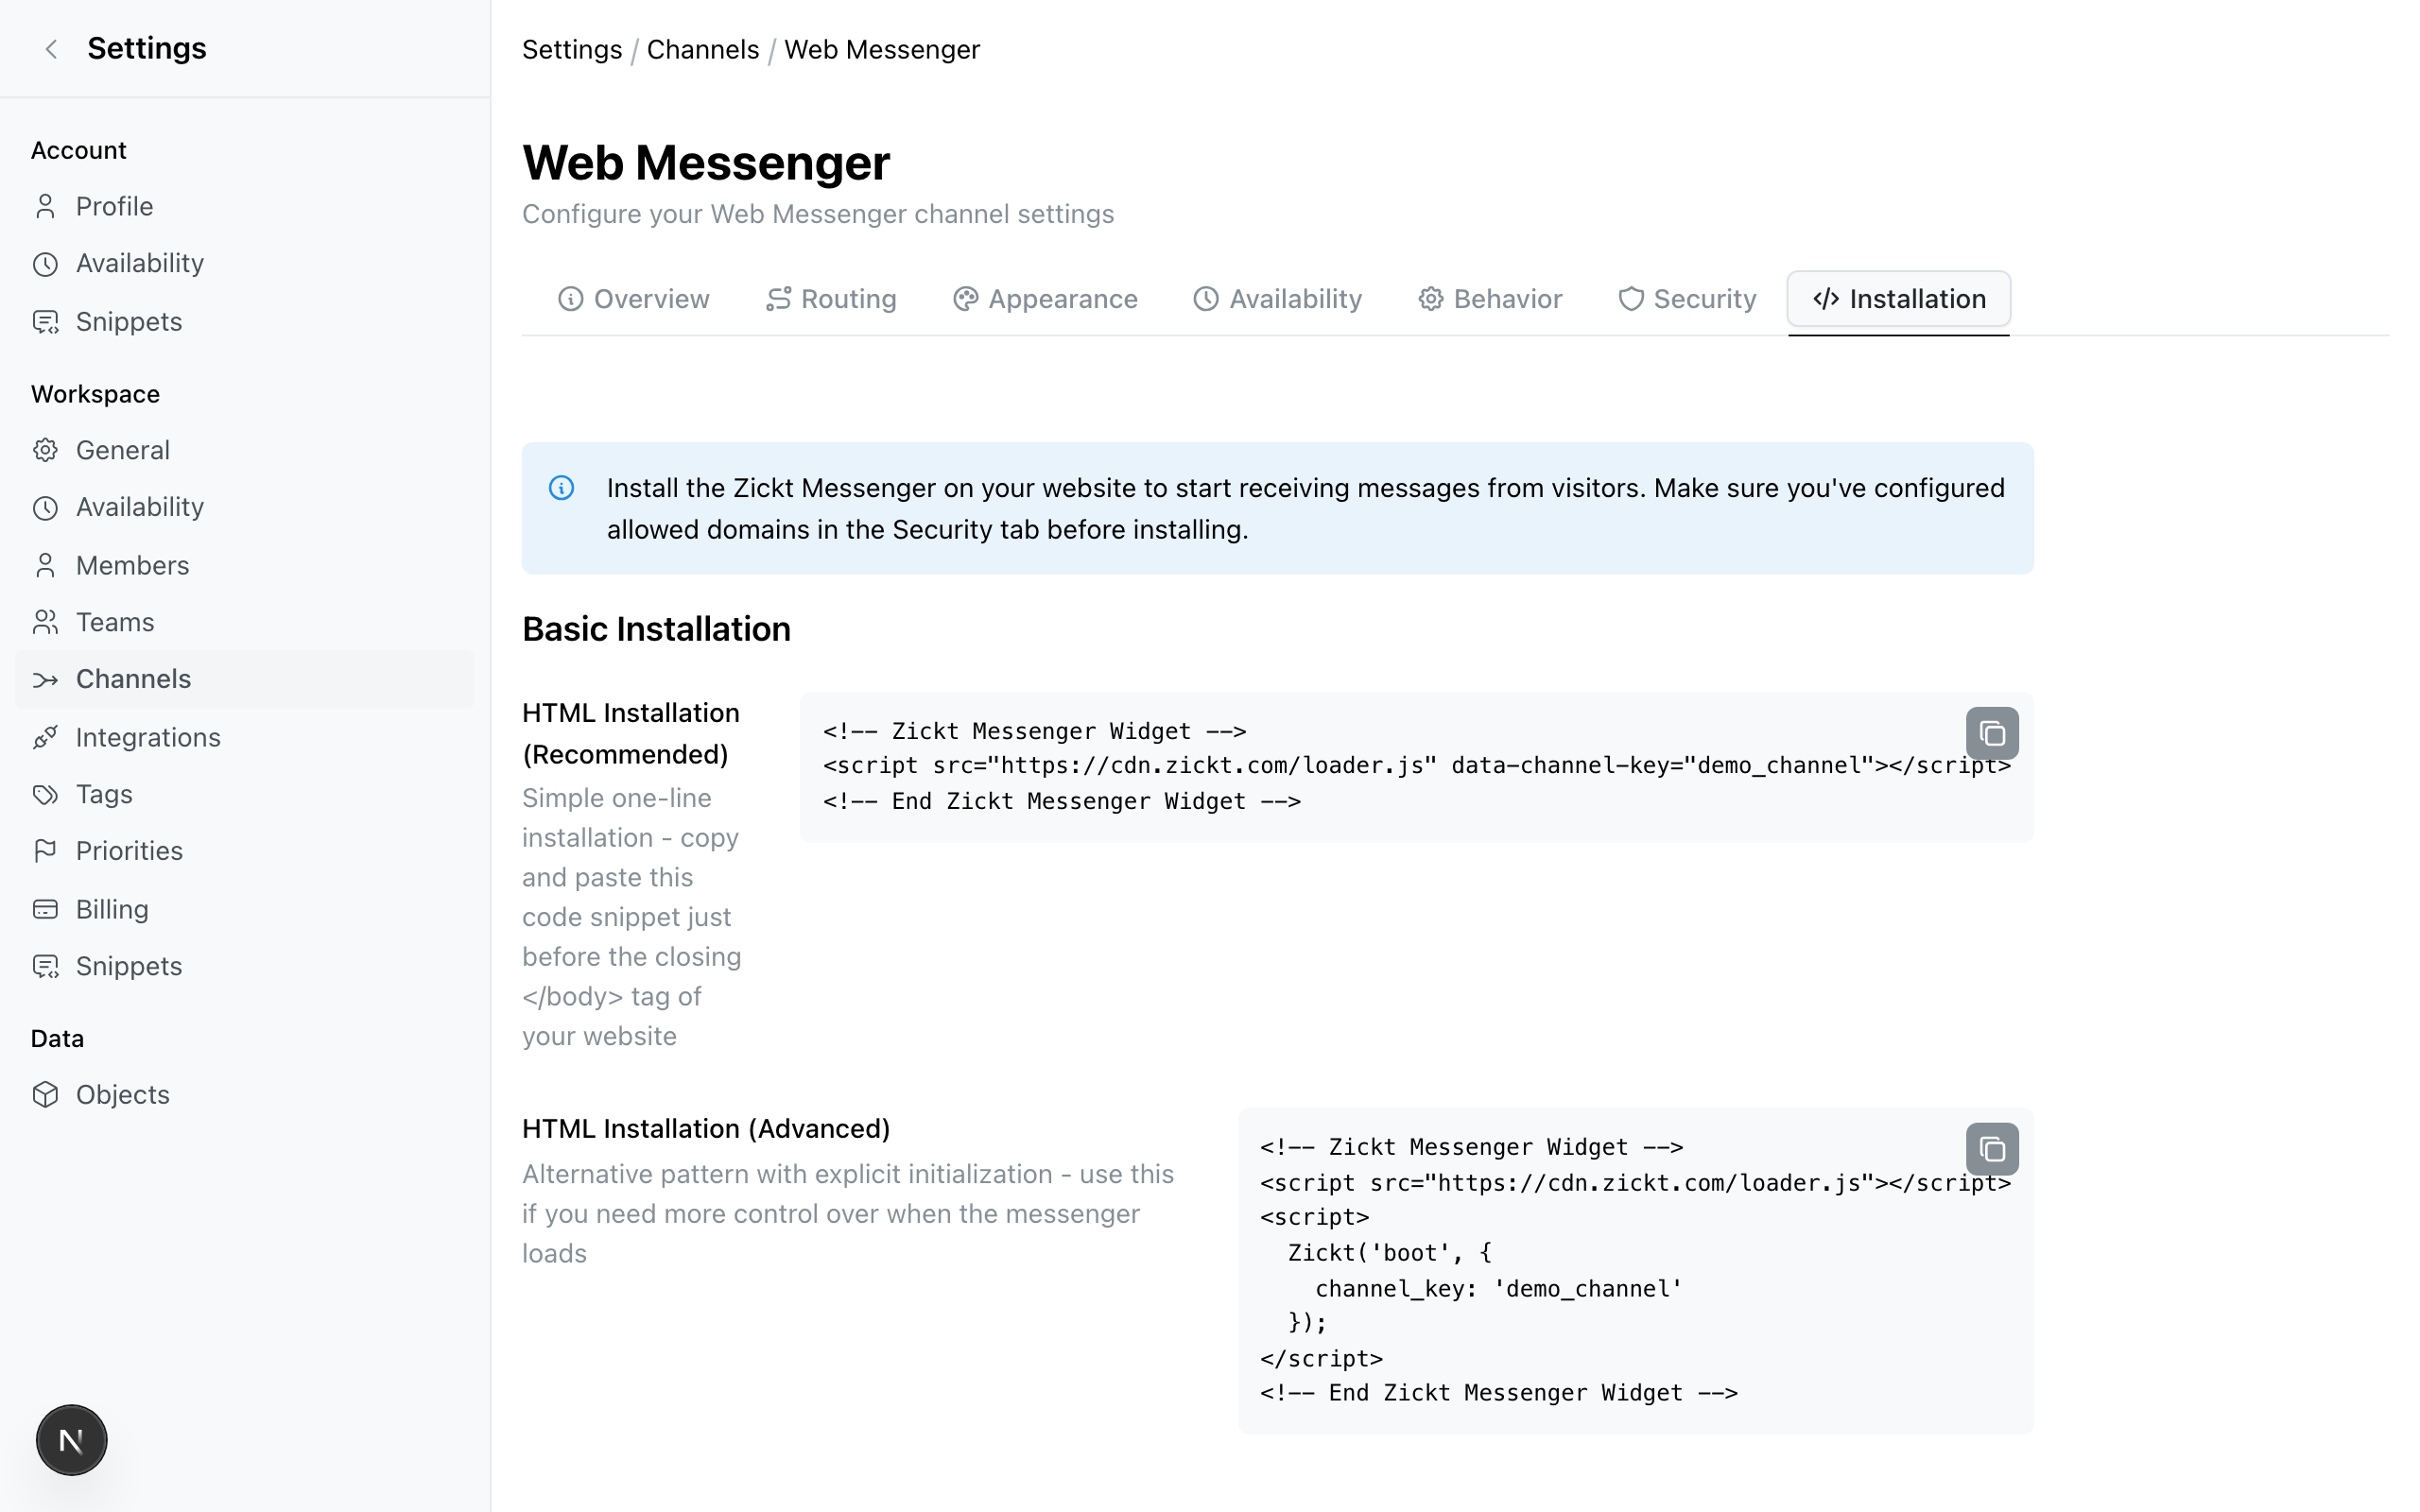
Click on your Messenger channel and select the Installation tab. Under Channel Information, copy the channel key.
One key per channel
Each Messenger channel has its own unique channel key. If you have multiple Messenger channels (e.g., for different brands), use the correct key for each site.
Configure allowed domains
Required before the widget will load
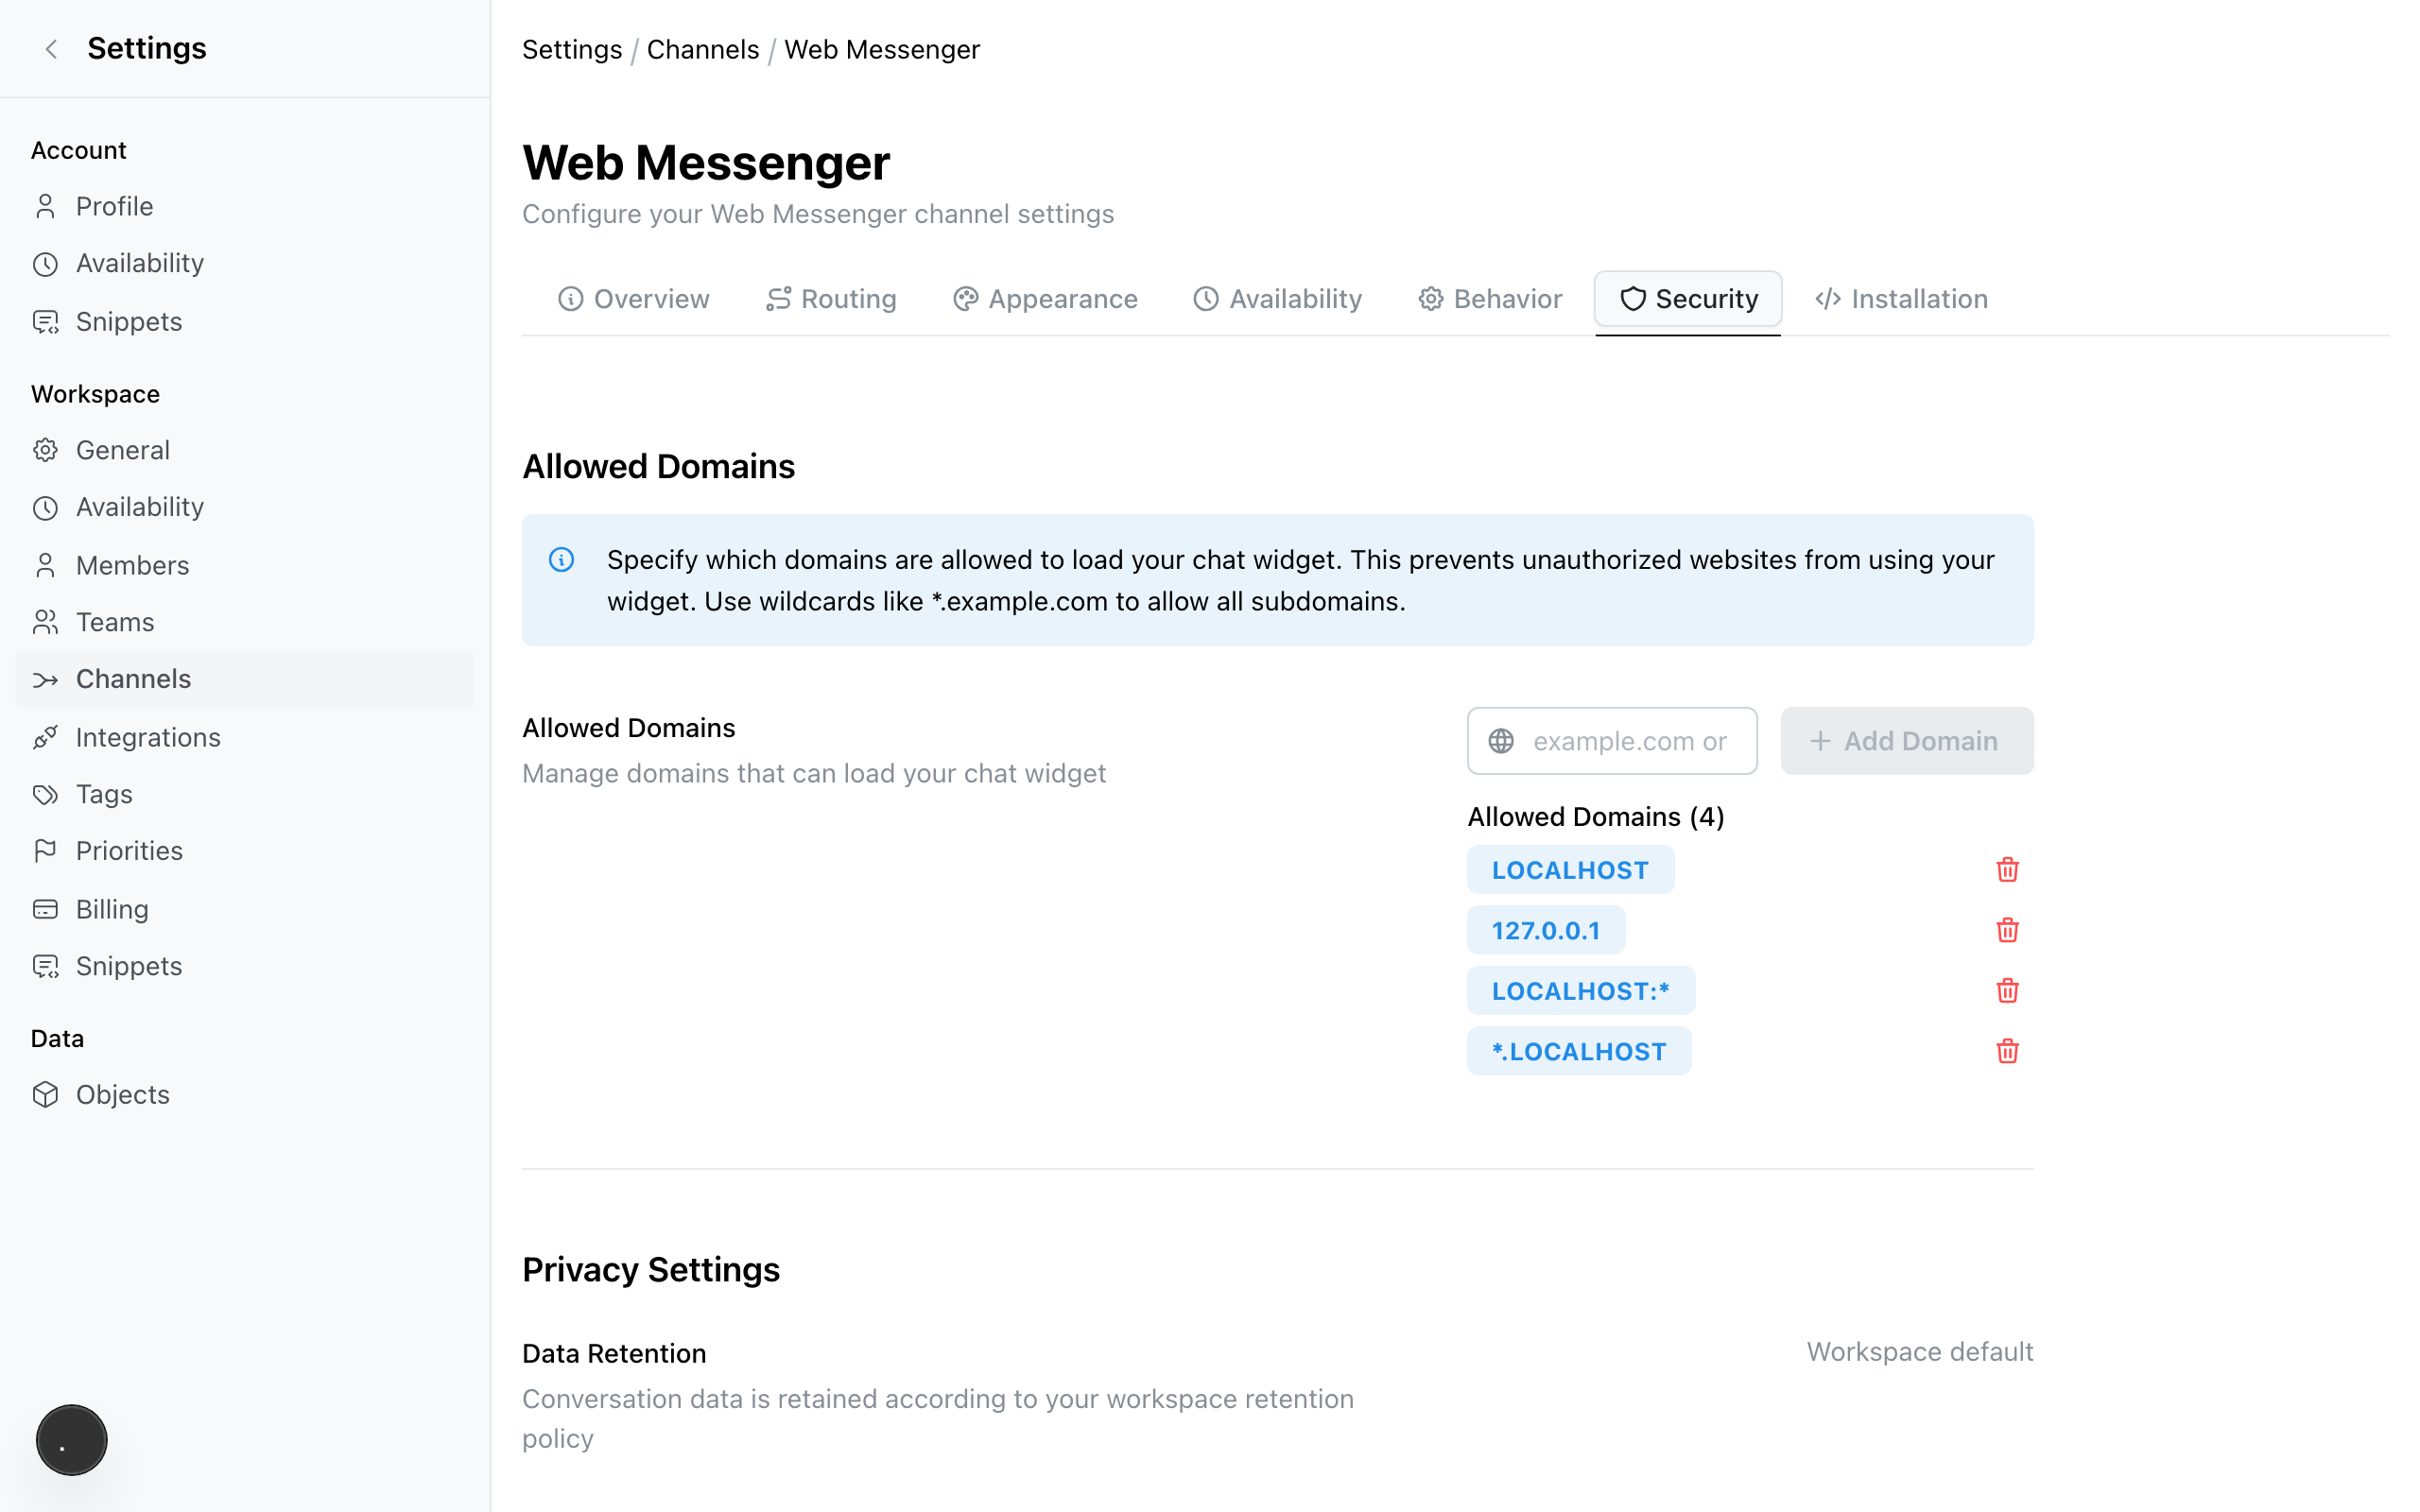
The chat widget will not load on any domain until you explicitly allow it. This prevents unauthorized use of your widget.
In your Messenger channel settings, go to the Security tab. Under Allowed Domains, enter each domain where the widget should appear and click Add Domain:
example.com— your production sitestaging.example.com— staging environmentlocalhost:3000— local development
Add the installation code
Choose the method that matches your website's tech stack:
Add this script tag before the closing </body> tag on every page where you want the widget to appear:
<script
  src="https://cdn.zickt.com/loader.js"
  data-channel-key="YOUR_CHANNEL_KEY"
></script>
Replace YOUR_CHANNEL_KEY with the key you copied in the previous step.
Use this approach when you need control over when the chat widget loads — for example, after a visitor accepts cookies or reaches a specific page.
<script src="https://cdn.zickt.com/loader.js"></script>
<script>
  Zickt('boot', {
    channel_key: 'YOUR_CHANNEL_KEY'
  });
</script>
The Zickt('boot', ...) call can be triggered at any time after the loader script has loaded.
Install the React package:
npm install @zickt/reactThen add the component to your app layout:
import { ZicktMessenger } from '@zickt/react';

function App() {
  return (
    <>
      {/* Your app content */}
      <ZicktMessenger channelKey="YOUR_CHANNEL_KEY" />
    </>
  );
}
The @zickt/react package also exports ZicktProvider and useZickt for programmatic control of the chat widget.
If you manage scripts through Google Tag Manager, create a Custom HTML tag with both the loader script and the dataLayer event:
<script src="https://cdn.zickt.com/loader.js"></script>
<script>
  dataLayer.push({
    'event': 'zickt_messenger_load',
    'zickt_channel_key': 'YOUR_CHANNEL_KEY'
  });
</script>
Set the trigger to fire on the pages where you want the widget to appear.
Customize appearance
Go to Settings > Channels, click your Messenger channel, and open the Appearance tab. From here you can configure:
- Position — bottom-right (default), bottom-left, top-right, or top-left
- Brand color — match the widget to your site's design
- Welcome message — the greeting visitors see when they open the widget
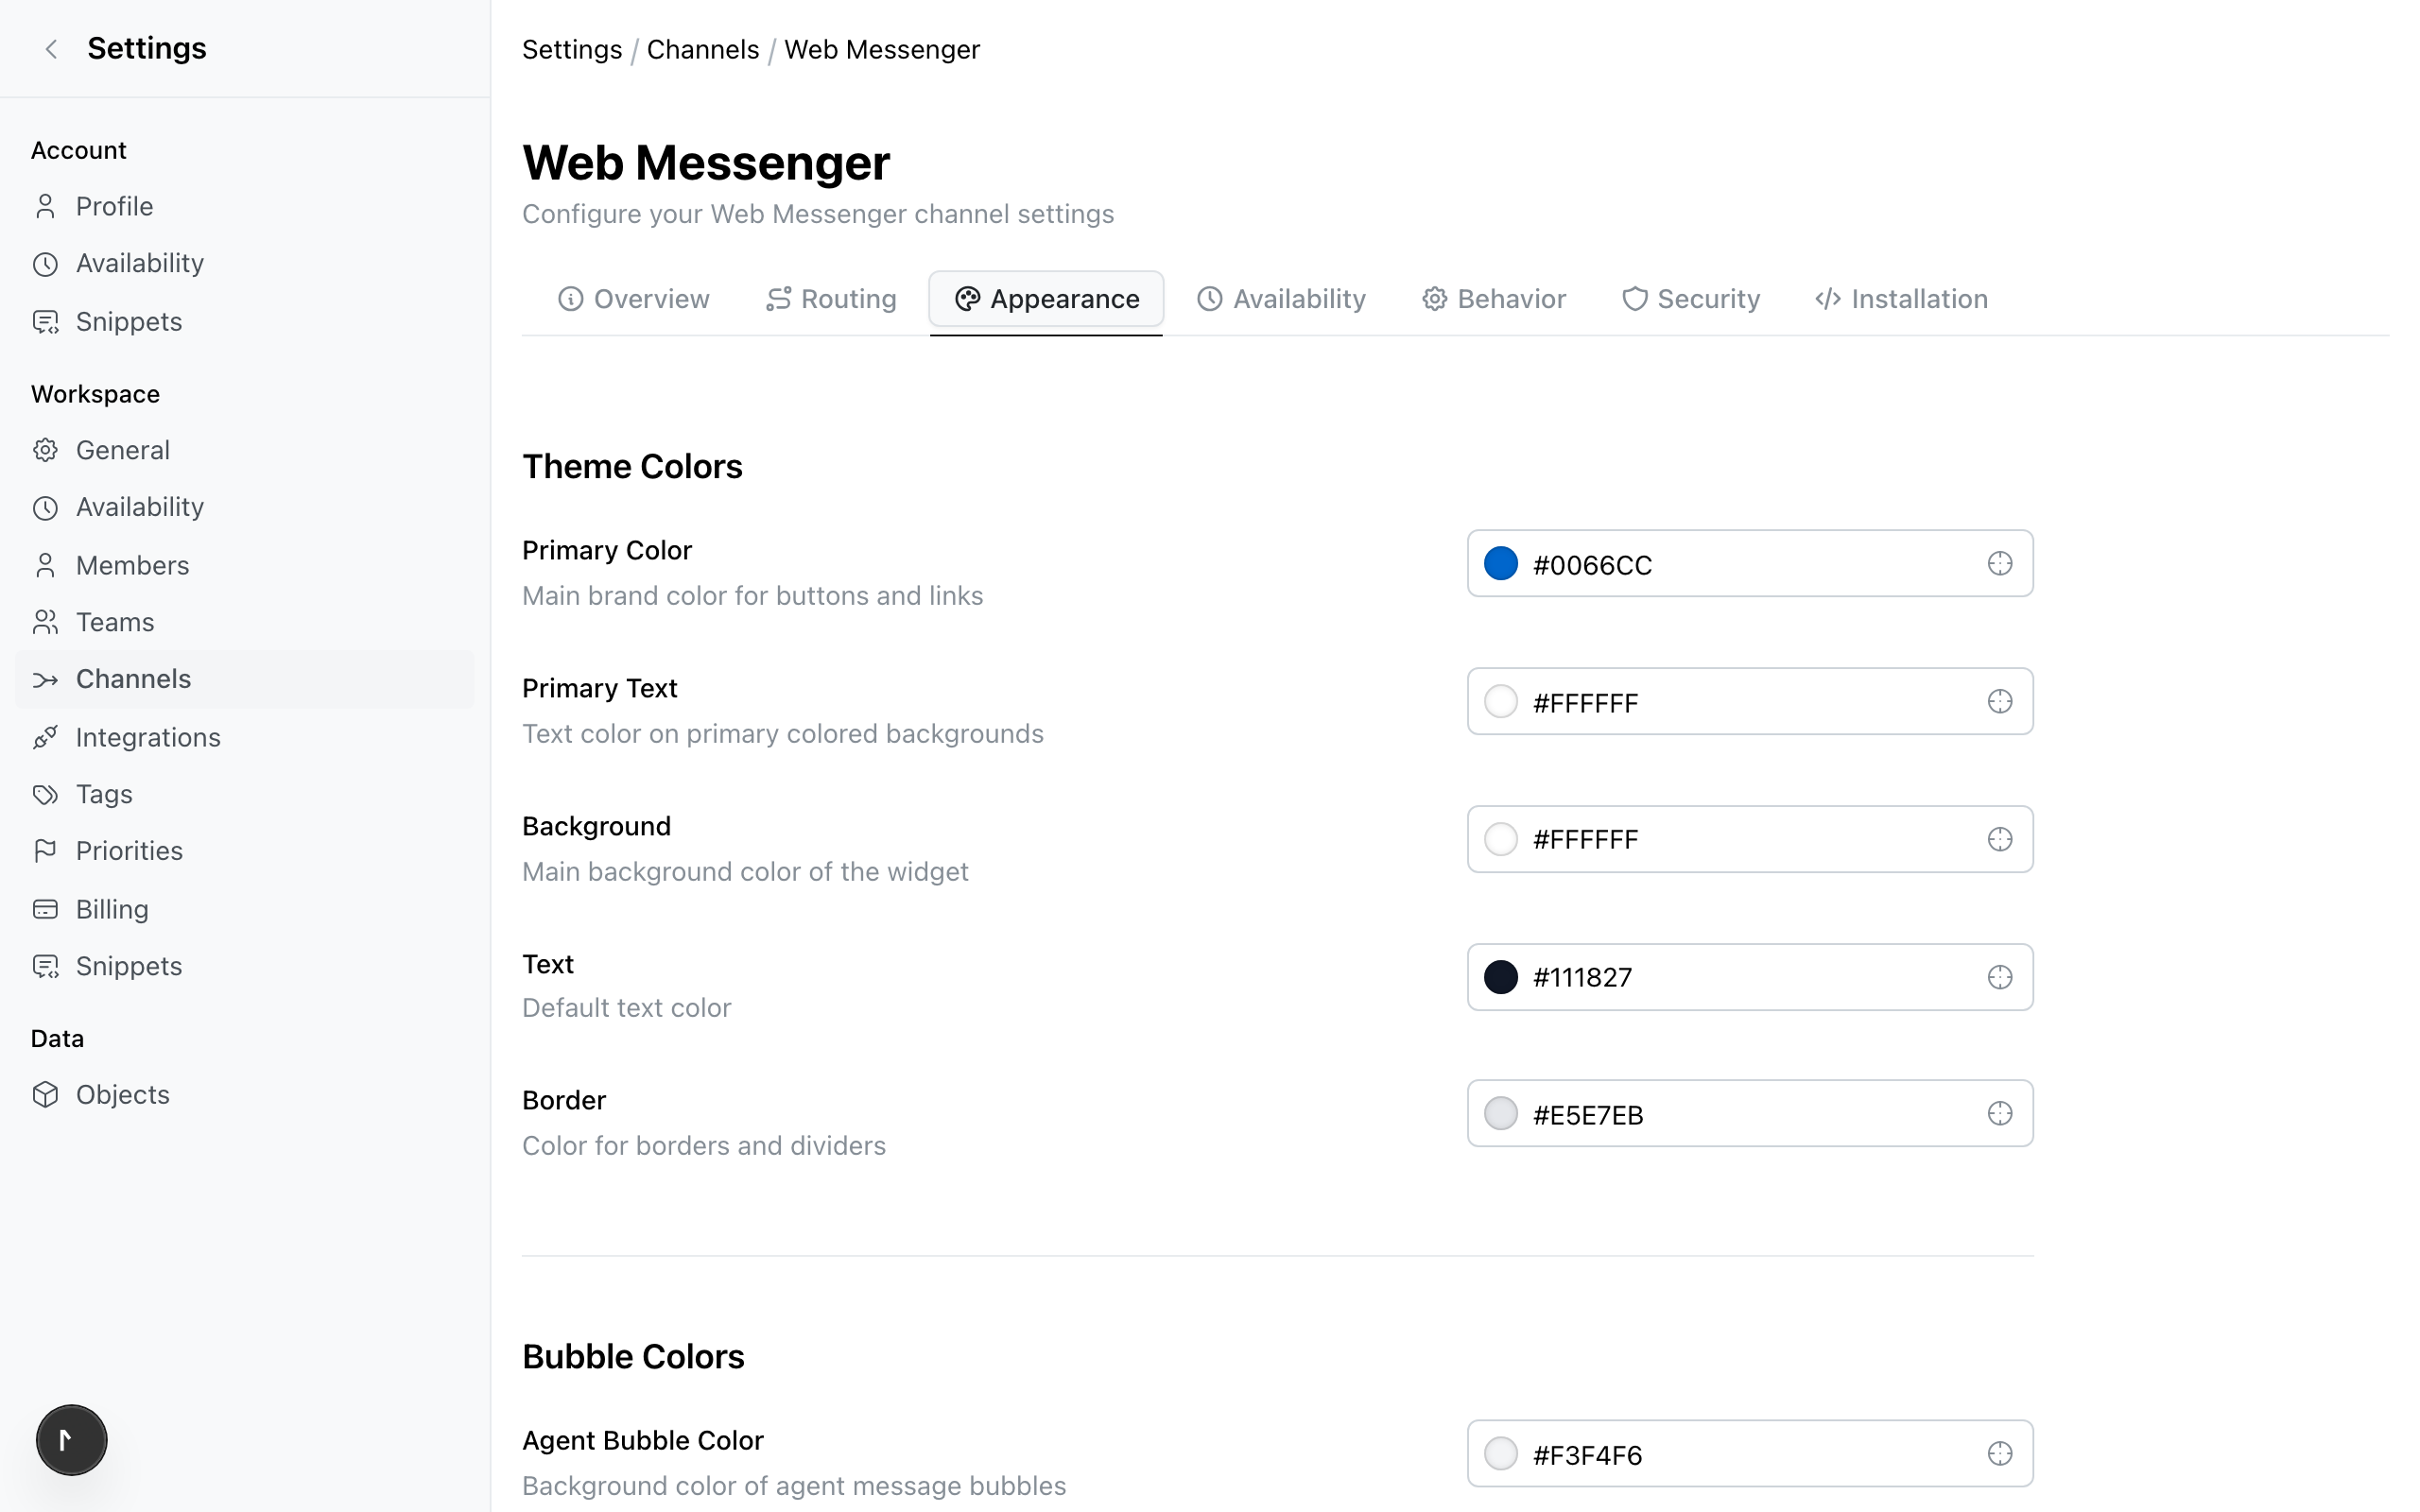
For full details on all customization options, read the Web Messenger reference.
Verify it works
- Open your website in a browser (or
localhostif testing locally). - Confirm the chat widget appears in the position you configured.
- Click the widget, type a test message, and send it.
- In Zickt, open the Shared Team Inbox and confirm the test conversation appears.
If the widget does not appear, check the troubleshooting section below.
Troubleshooting
Related
- Web Messenger reference — full configuration and customization options
- Shared Team Inbox — view and respond to live chat conversations
- Getting started — set up your Zickt workspace
- Channels overview — all available communication channels